Integrate QnA Maker Bots - Part 1 - Public Website

Problem Statement#
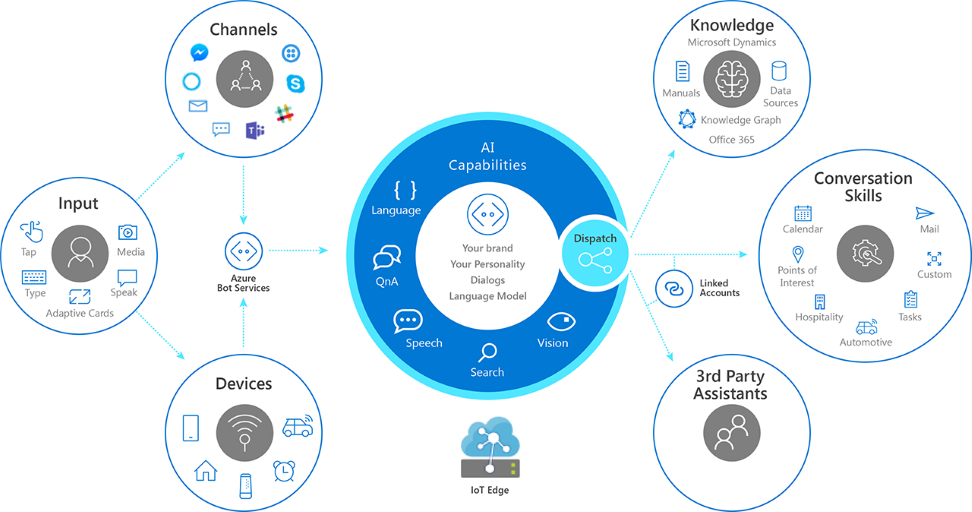
Nowadays, it’s quite common to add a “virtual assistant” (a.k.a chatbot) to your public facing website. Almost every organization, especially the ones dealing with endusers (B2C market-oriented organizations) try to add value to their websites in form of a bot. And Microsoft has done a pretty good job, making it easy to build a bot, with little effort and almost no coding. But unfortunately, there is not a complete guide provided, on how to create the bot from the very first click until it can be deployed on to a public website. So this post, shall be one of a few in a blog post series, where I will tackle, the various deployment/integration options you have for your bot (like a webiste, like a SharePoint Online page, Microsoft Teams, …).
QnA Maker and Azure Bot Creation#
So the first thing we need is our bot, of course. So in order to create a bot, you need an Azure Subscription, where you have the permissions to create new resources in (but I won’t go through that step, as this is very well documented in the docs .
QnA Maker Knowledge Base#
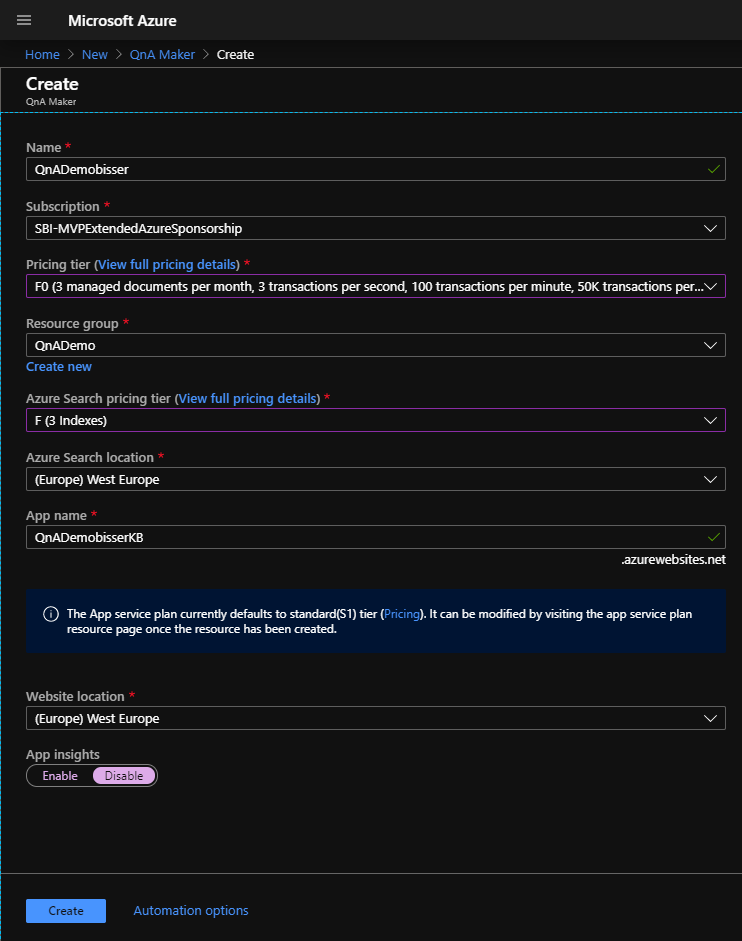
In order to create a knowledge base, we need to head over to the Azure Portal to create a new QnA Maker resource and fill out the details to fit your needs as shown here:
Next up, we need to go to the QnA Maker portal , sign in with the account you used for creating the Azure resource and go to the “Create a knowledge base” page to create a new knowledge base along with the necessary details:
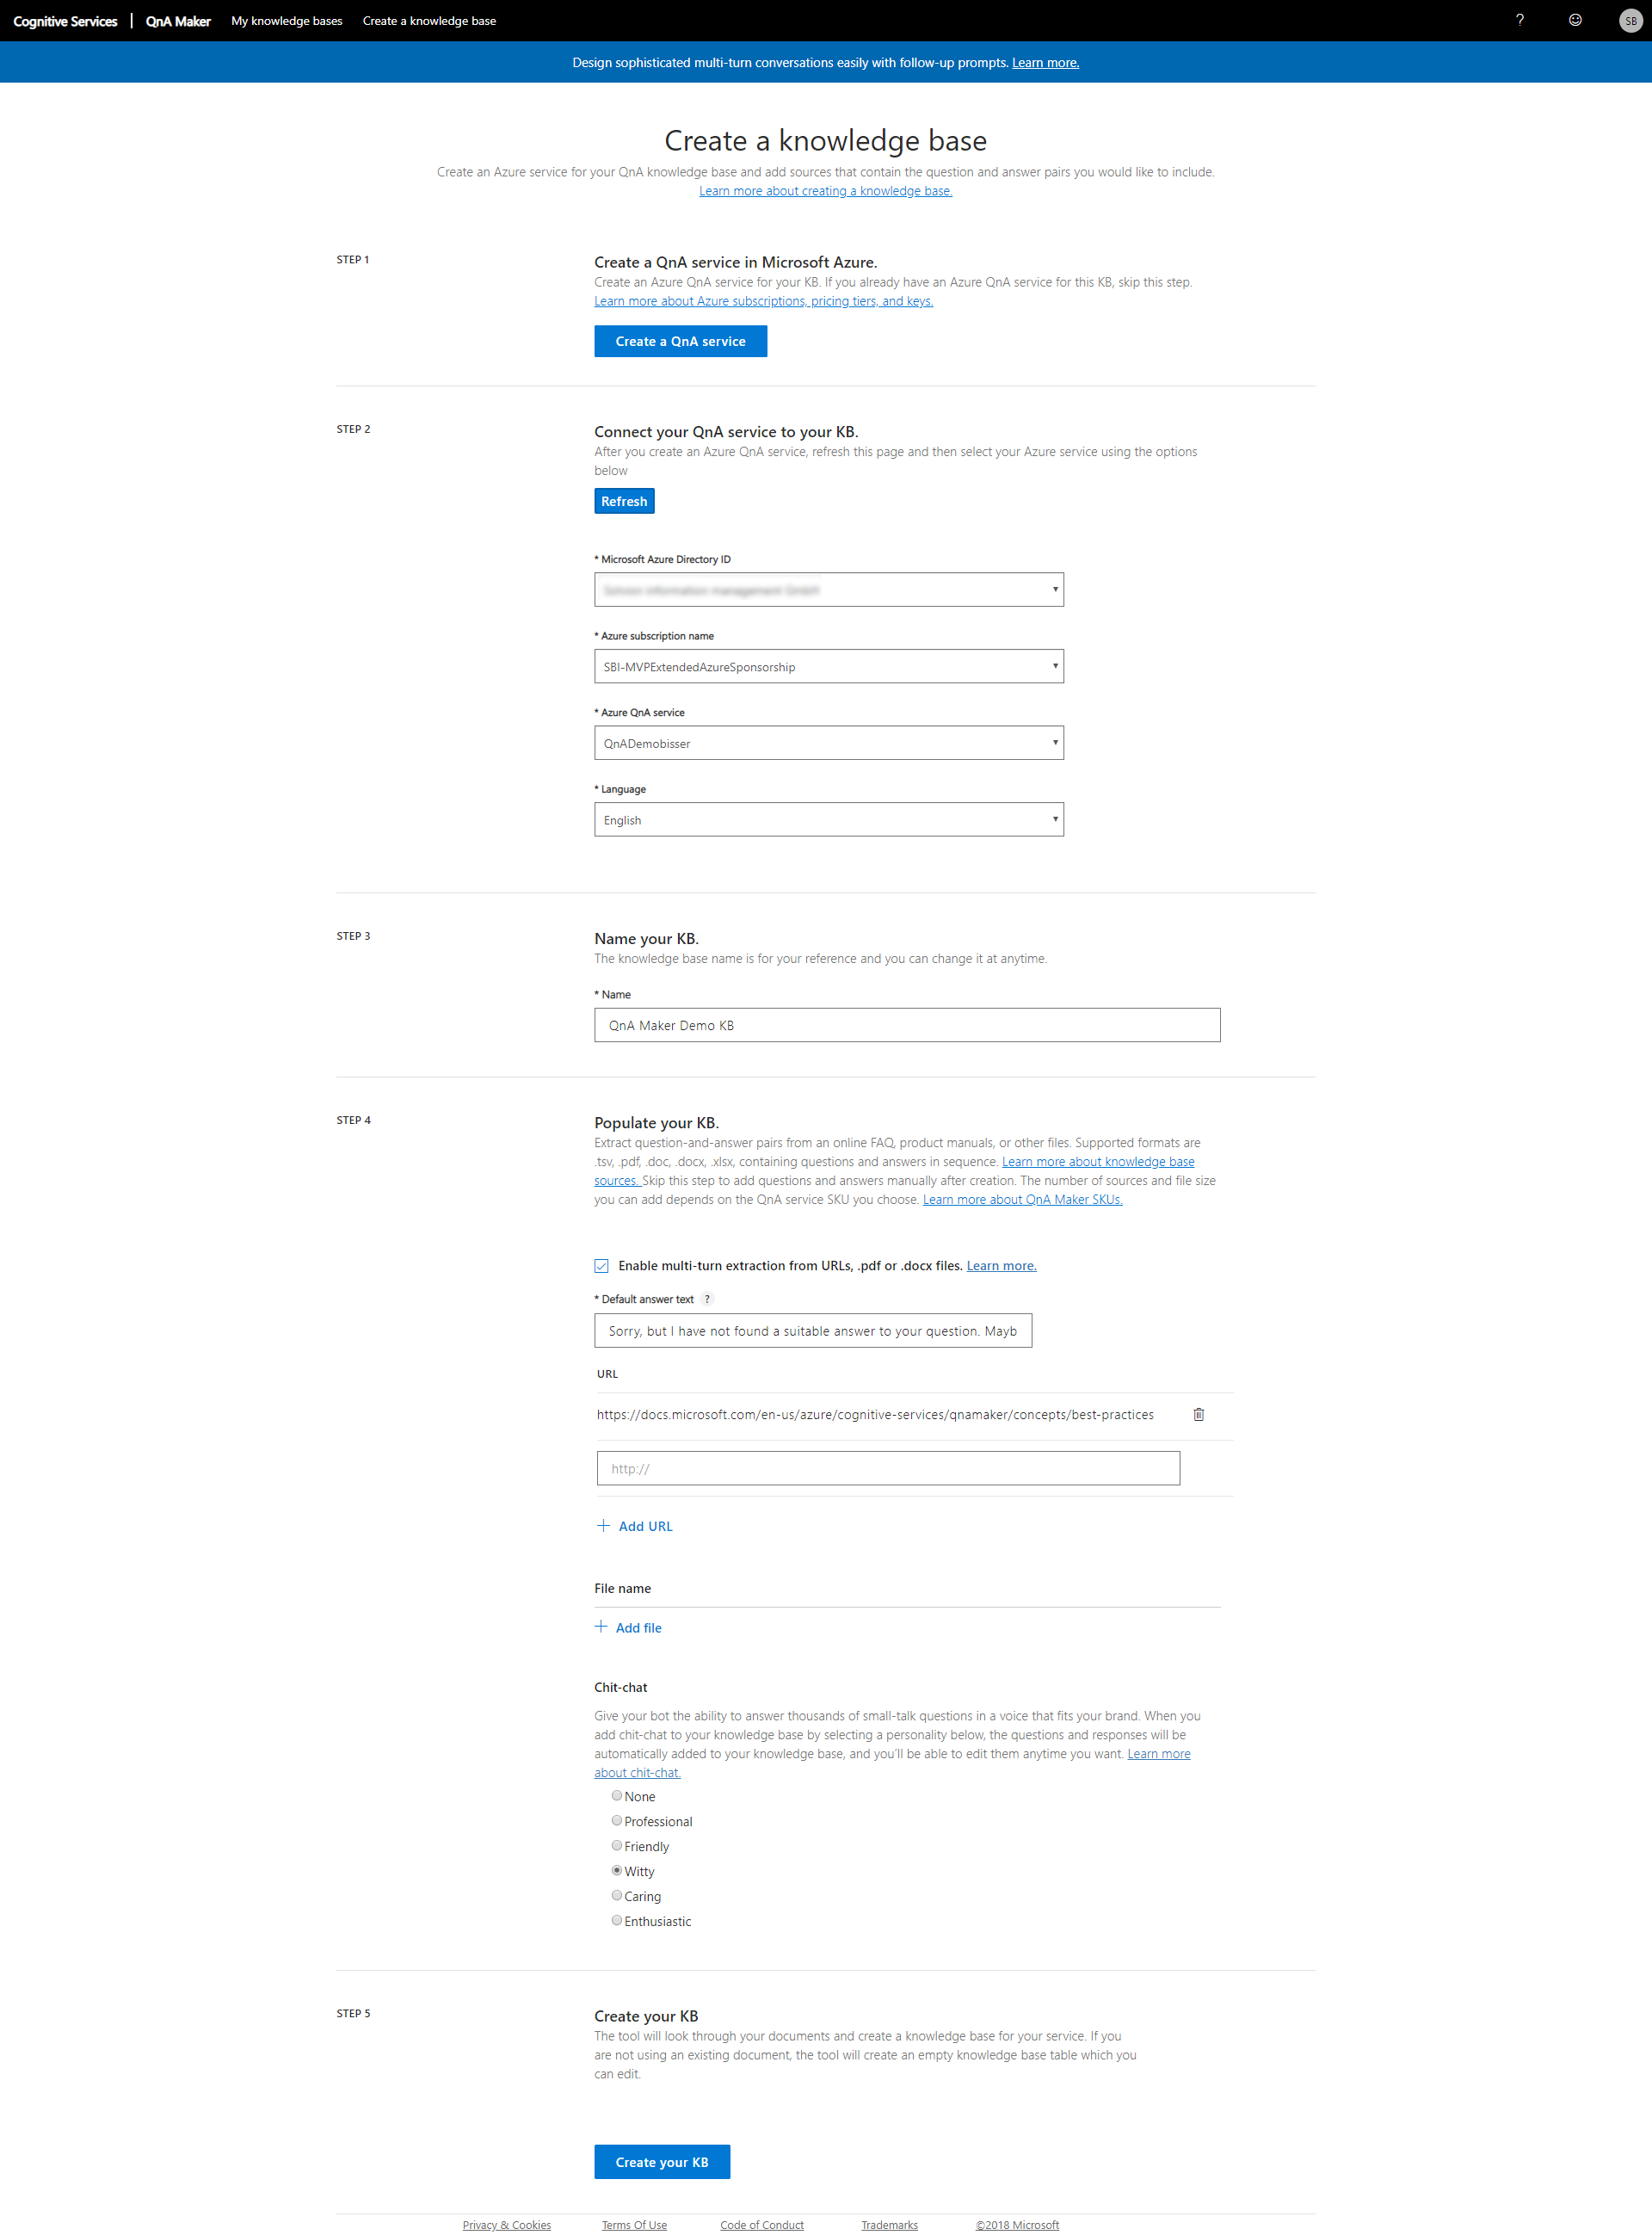
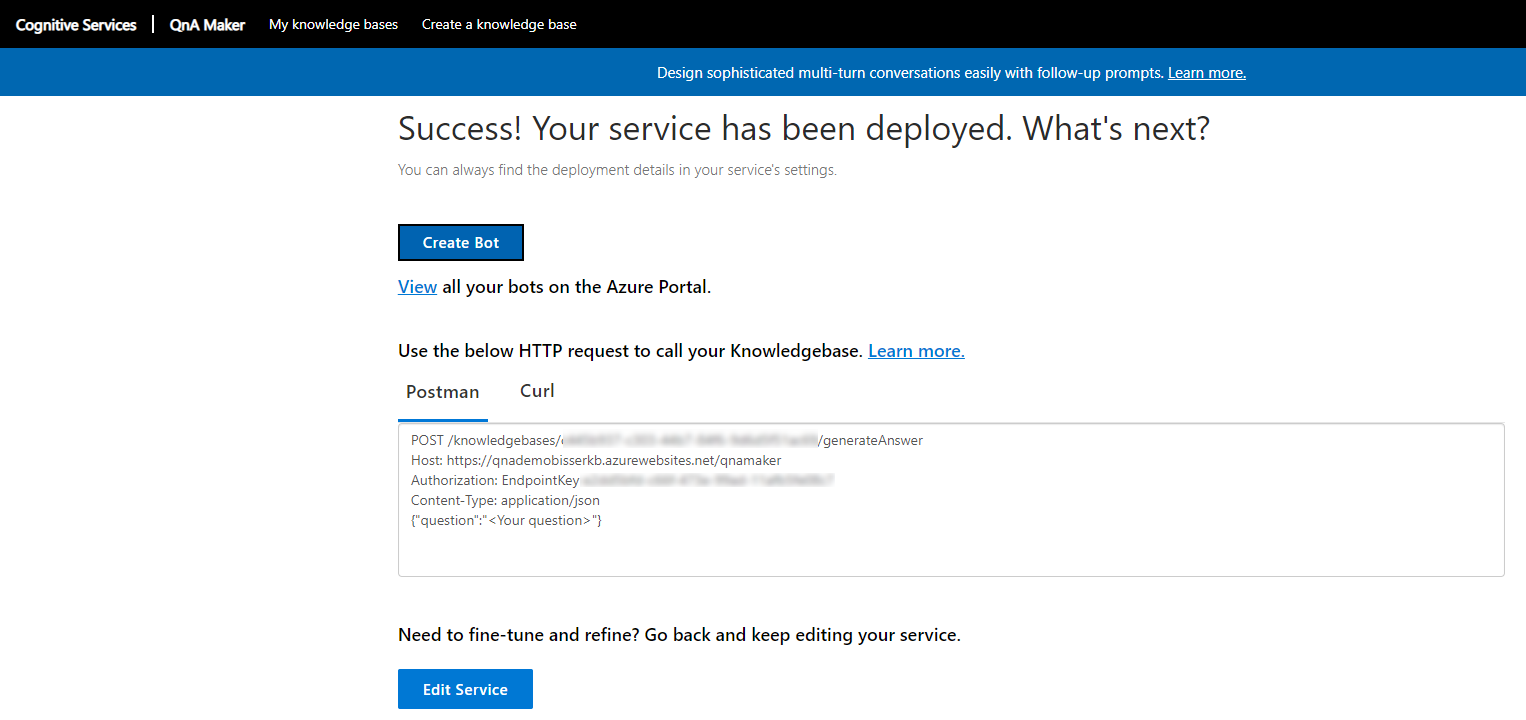
So in my case, I enabled the multi-turn extraction feature for my knowledge base and added a URL to a PDF to extract the questions and answers from. Another quite new feature is that you now can choose the actual language of the KB, which affects the chit-chat and the ranking algorithms of the KB which you create. Now upon entering all the details, you can go ahead and create your knowledge base. After the KB has been created, you can either alter the QnA pairs in there or if you are happy with the KB contents, you can go to the Publish page and publish your QnA Maker knowledgebase:
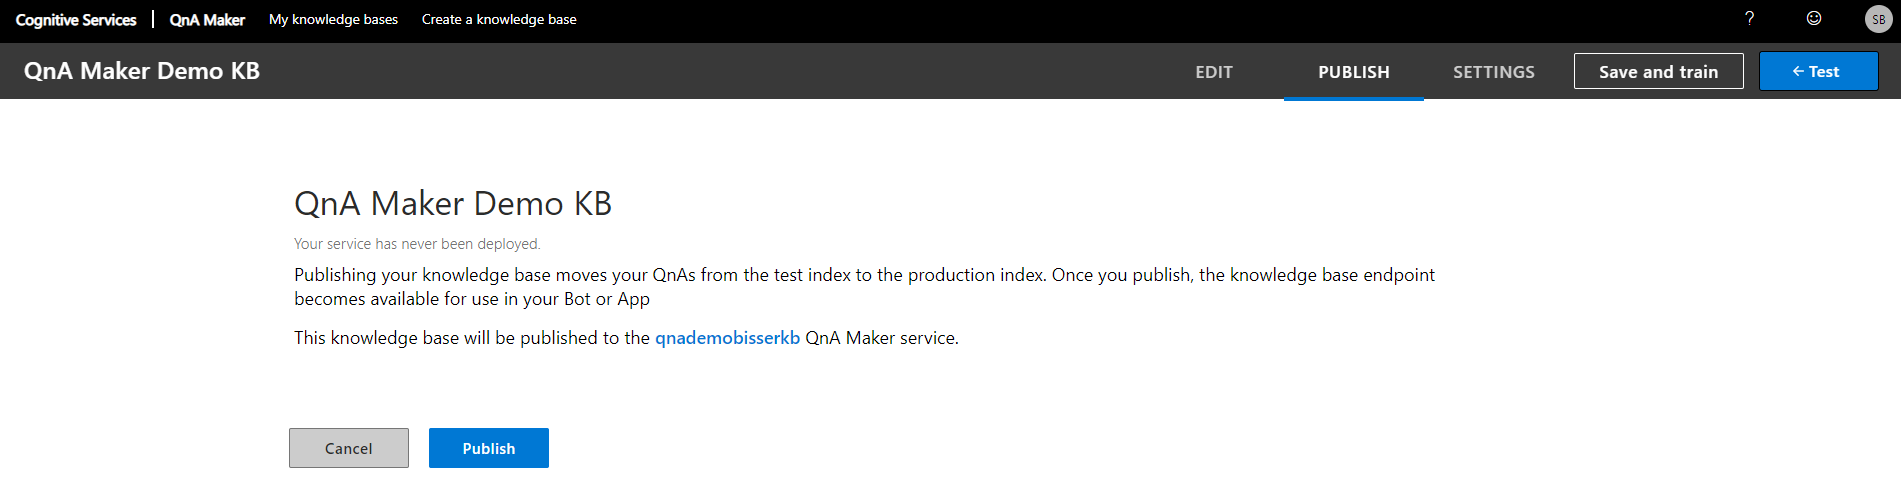
And so after it has been published, the API endpoint gets available and is now ready to be consumed by your application/bot:
Azure Bot Creation#
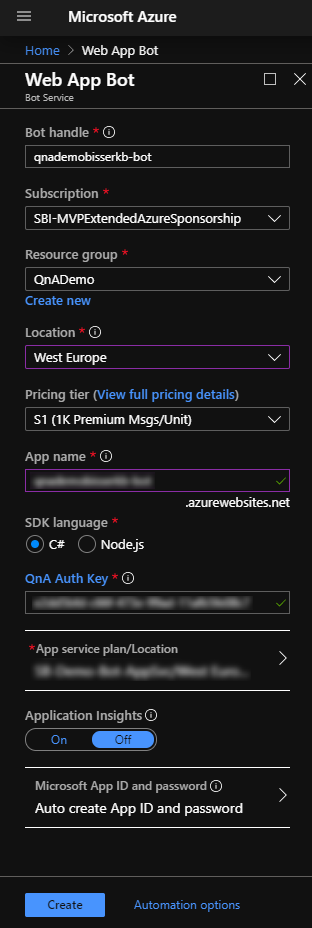
So the next obvious step would be to create our bot. In the past we would need to create a bot from the Azure portal first and then add some lines of code to call QnA Maker to get the right answers for the users’ inputs, but this, fortunately, is a thing of the past. The simplest way of creating a QnA Maker integrated bot is to hit the “Create Bot” button right from the Publish page in the QnA Maker portal. So when you click that button, you will be redirected to the Azure portal and the creation pane of a new web app bot is shown. Now this creation pane is somewhat different compared to the one when you create a new bot from the Azure portal, as it has some attributes already pre-filled, like your QnA Auth Key and the regions and so on, so you basically just need to hit Create:
After a couple of minutes, your new Azure Web App Bot should be created and you should be able to test it in the webchat right from the Azure Portal. So now the bot is ready, we can go to the next step and add it to our website.
Bot Integration Into Website#
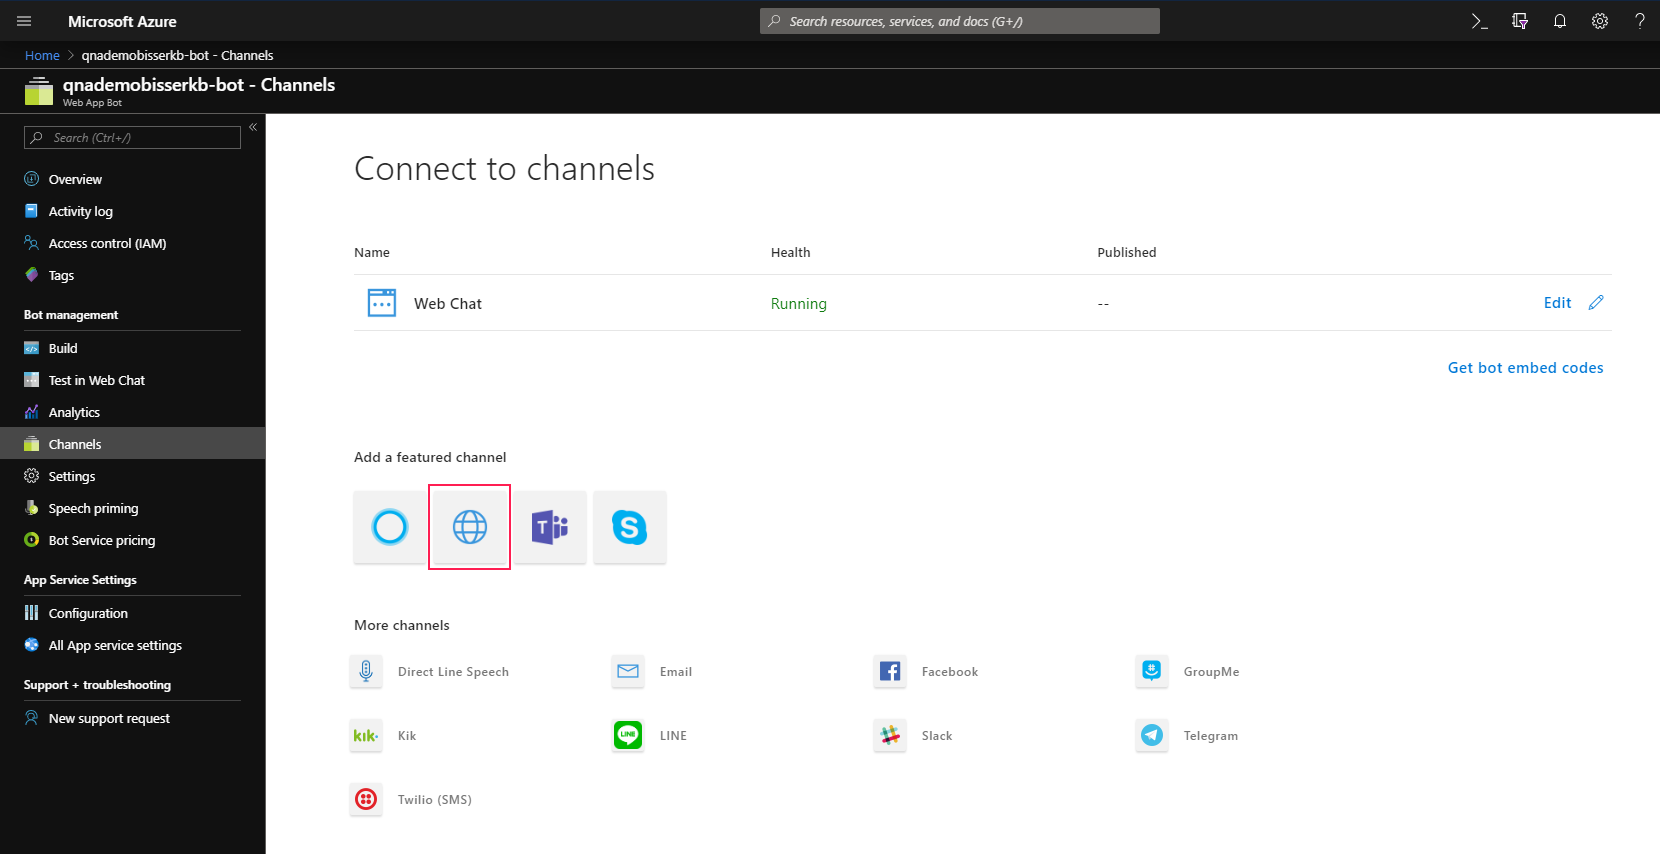
If you have a public facing website, it’s quite easy to integrate a Azure bot into your website. First thing we need is to go to the Channels section in out bot’s menu pane within the Azure portal and click on the “Direct Line” channel icon to enable it:
Upon the “Configure Direct Line” page opens, copy one of the two secret keys and click done. Now you will be redirected back to the channels page, where you need to click “Get bot embed codes” in order to get the most easiest way of integrating a bot into a website - an IFrame embed code, which may look as follows:
<iframe src='https://webchat.botframework.com/embed/YOUR_BOT_NAME_HERE?s=YOUR_SECRET_HERE' style='min-width: 400px; width: 100%; min-height: 500px;'></iframe>
So what you actually would need to do now is to replace the two placeholders in there with your bot’s name and your Direct Line secret key you copied earlier and then you could integrate that line of html code into your website to enabled the bot webchat in your site.
Webchat Styling#
But in many cases the default styling of the webchat you get with that embed code isn’t what you might be looking for, so we need to go another path of integrating the webchat component in your site. In one of my previous posts I went through the options you have in terms of styling the Bot Framework webchat component, so we’ll follow along and integrate the bot into our website with slightly more lines of code, but have the advantage of adding custom styling (colors, avatars, fonts, …) to our webchat component on our site. So a good example would be to add the following lines of code to your HTML code of your website to integrate the bot along with custom styling options for the bot’s chat window and add your own Direct Line secret in there as well as change, the pictures used in the webchat:
<script src="https://cdn.botframework.com/botframework-webchat/latest/webchat.js"></script>
<script>
    window.WebChat.renderWebChat(
    {
        directLine: window.WebChat.createDirectLine({
            token: 'YOUR_DIRECTLINE_SECRET'
        }),
        userID: 'user',
        username: 'user',
        locale: 'en-US',
        styleOptions: {
            botAvatarImage: 'https://bisserio.blob.core.windows.net/img/bot_bisserio.png',
            userAvatarImage: 'https://cdn.sharepointeurope.com/wp-content/uploads/speakers/2018/05/Stephan-Bisser.png',
            bubbleBackground: '#BAC1C6',
            bubbleTextColor: '#000000',
            bubbleFromUserBackground: '#58A9DB',
            bubbleFromUserTextColor: '#FFFFFF'
        }
    },
    document.getElementById('webchat')
    );
</script>
So after you have added these lines of code to your website, the webchat component should look similar to this one:
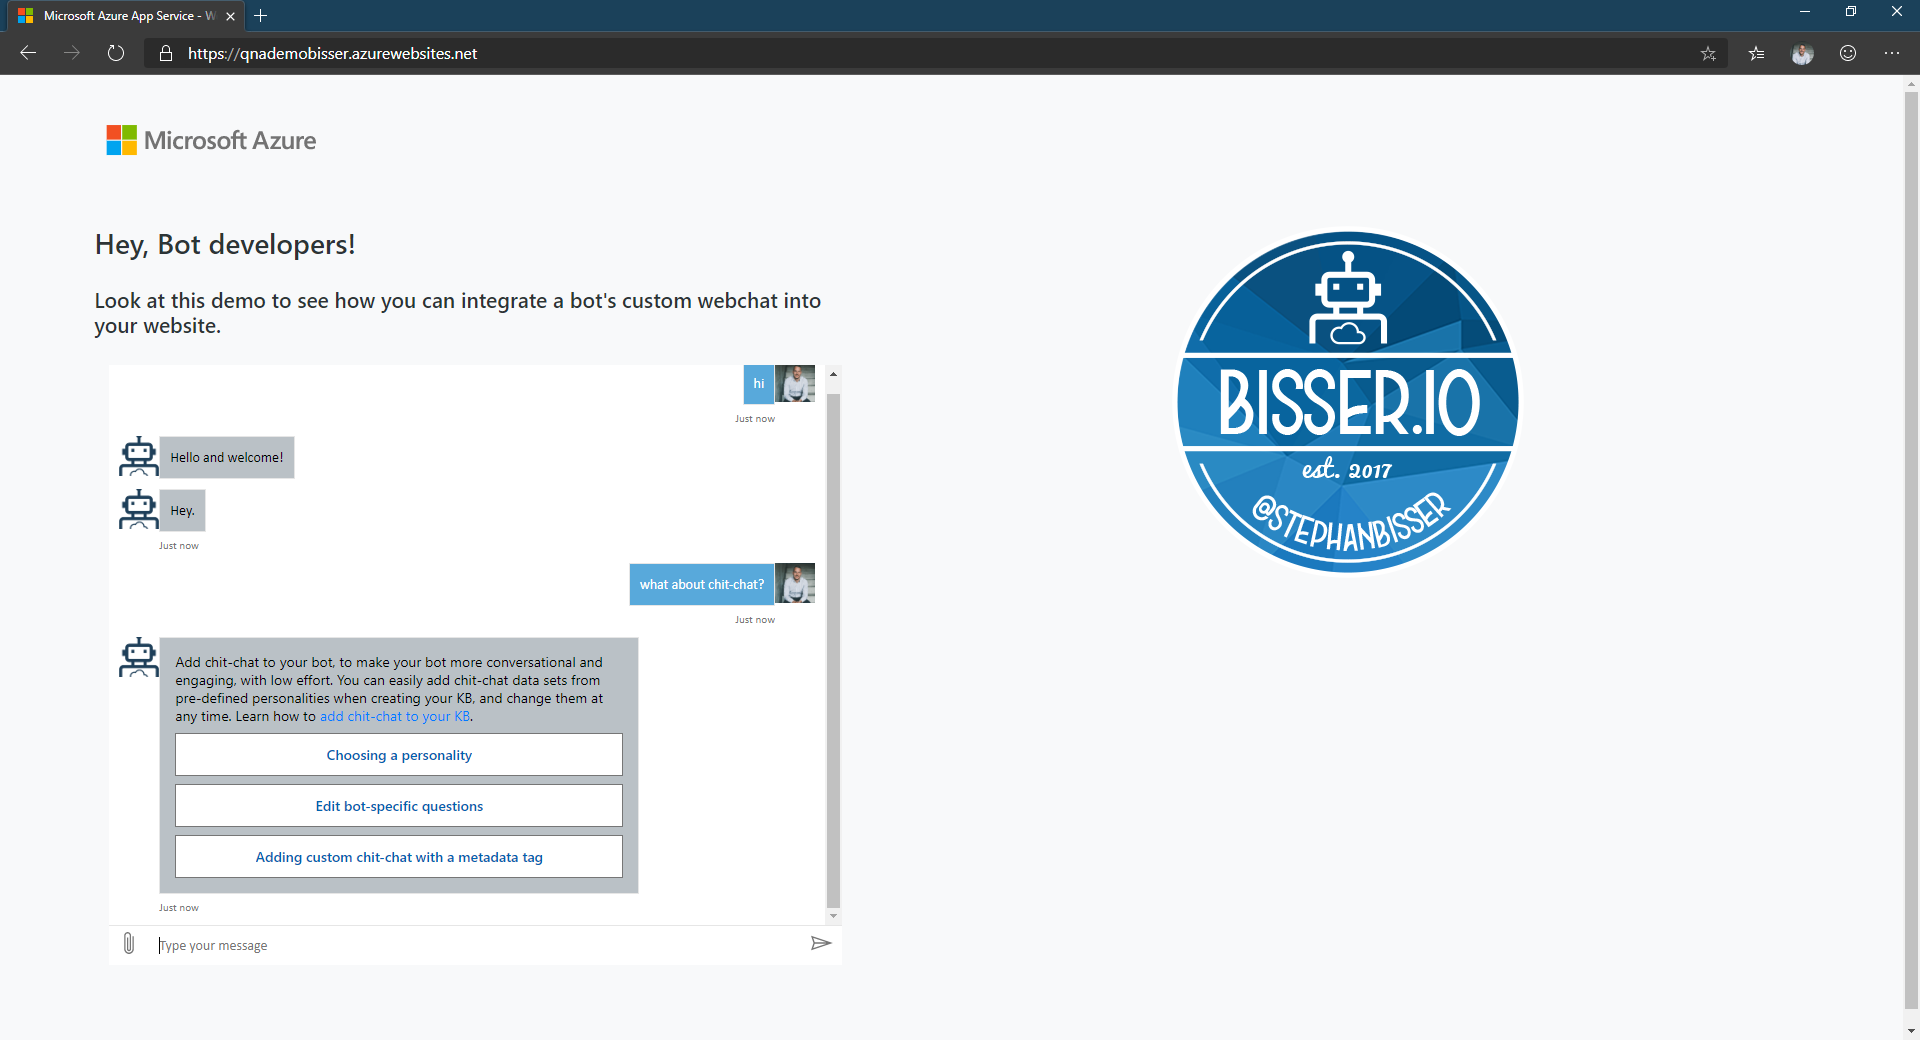
So now you can play around with the styling options mentioned here to add your favorite colors and other visuals to the webchat component on your public website to render the bot’s webchat accordingly and make it fit to your website’s design guideline.
Summary/Outlook#
If you walk through the steps mentioned above, you will have a working bot deployed on your website within a couple of moments, so this proves, that the actual creation of a simple QnA bot as well as the webchat integration of that bot in a website via HTML and JavaScript is not a hard task. In the next part of this blog post series, we’ll take a look at another channel for integrating the bot into and do some sort of styling in there, so stay tuned…